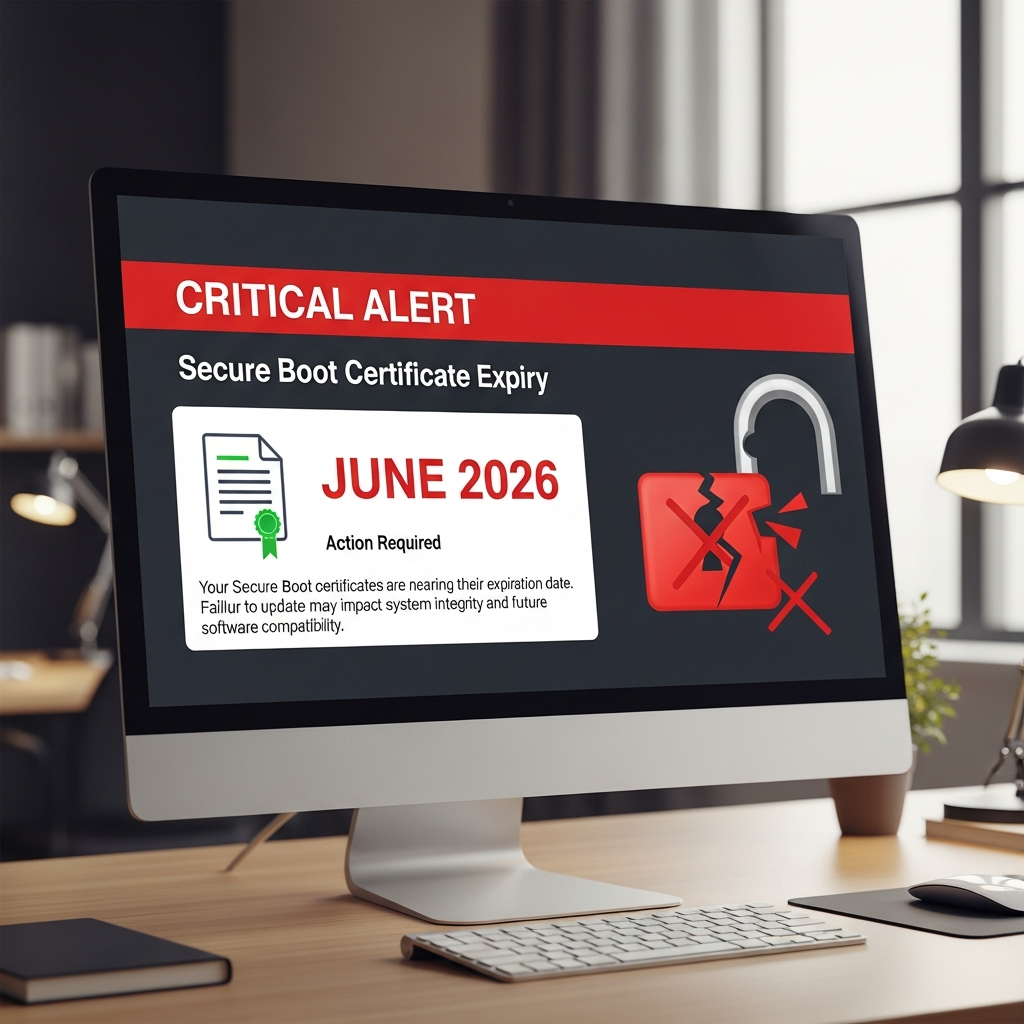
The silent guardian of your Windows PC, Secure Boot, relies on digital certificates that are fast approaching their expiry date in June 2026. While these essential security components have worked unnoticed since 2011, their impending expiration could leave many systems vulnerable or even unable to boot if not updated. Microsoft is pushing automatic updates, but a significant number of PCs may still miss these crucial patches. This guide provides an essential check and clear steps to ensure your computer remains secure and functional long after the deadline.
What is Secure Boot and Why It’s Critical for Your PC’s Security
Secure Boot is a fundamental security feature integrated into your PC’s UEFI (Unified Extensible Firmware Interface) firmware. Its primary role is to safeguard your system during startup, preventing unauthorized or malicious software, like rootkits, from loading before Windows even begins. By verifying the digital signatures of every piece of boot-up software, Secure Boot ensures only trusted components initialize your operating system.
This mechanism acts as a critical barrier against low-level threats that could otherwise compromise your entire system from the moment it powers on. For Windows 11, Secure Boot is a mandatory requirement, underlining its importance in Microsoft’s “secure by design” approach. Without updated certificates, your PC’s foundational security could be severely degraded.
The Impending 2026 Deadline: Understanding the Risk
The original Secure Boot certificates, operational for over a decade, are set to expire in June 2026. This isn’t just a technical detail; it’s a critical security event. PCs still relying on these old certificates will enter a “degraded security state.” This means they will be increasingly exposed to new boot-level vulnerabilities, as they won’t be able to install the latest protections.
Over time, this can lead to significant compatibility issues. Devices might struggle to boot, fail to install newer operating systems (which will demand the 2023-era certificates), or experience problems with firmware, hardware, and other Secure Boot-dependent software. Microsoft’s Nuno Costa emphasizes this certificate update as a generational refresh of the trust foundation for modern PCs, ensuring future innovations can build on a secure boot process. Proactive action now is key to avoiding future disruptions and maintaining robust protection.
Are You Affected? How to Check Your PC’s Secure Boot Status
Determining your PC’s readiness is the first, most crucial step. There are a couple of ways to check, depending on your Windows version and comfort level.
Windows 11 Easy Check via Windows Security
For many Windows 11 users, Microsoft has simplified the process. Recent updates (like the April 2024 patch) introduced a more user-friendly way to check:
- Open your Start menu and type “Windows Security.”
- Select the “Windows Security” app from the results.
- Navigate to “Device Security.”
- Scroll down to the “Secure Boot” section.
- Open the Start menu, type “PowerShell,” and select “Run as administrator.”
- Once open, paste the following command exactly as written and press Enter:
- Open your Start menu, type “Settings,” and select the “Settings” app.
- Go to “Windows Update” (usually in the left pane).
- Click “Check for updates” and install any pending updates.
- Ensure automatic updates are enabled. Consider sending diagnostic data to Microsoft (Settings > Privacy & Security > Diagnostics and Feedback) as this helps the system identify and deliver necessary certificates.
- Identify your PC’s specific model number.
- Visit your Original Equipment Manufacturer’s (OEM) support website (e.g., Dell, HP, Lenovo, ASUS, Acer).
- Search for your model and look for the latest firmware or BIOS updates. Download and install according to the manufacturer’s instructions.
- Open Command Prompt as an administrator (Search “CMD,” right-click, “Run as administrator”).
- Paste the following command exactly as written and press Enter:
- Crucial Warning: If you use BitLocker encryption, ensure you have your recovery key readily available before proceeding. Resetting Secure Boot keys can trigger BitLocker recovery.
- Restart your PC and enter your BIOS/UEFI settings. This usually involves pressing a specific key (e.g., F2, F10, DEL) during startup.
- Navigate to the “Security” or “Boot” section.
- Look for options like “Restore Factory Keys,” “Clear Secure Boot Keys,” or “Reset to Setup Mode.” Select the option to clear or reset.
- Save your changes and exit BIOS.
You should see one of two key messages:
“Secure Boot is on, preventing malicious software from loading when your device starts up.” This is the ideal state; your certificates are updated, and you’re good to go.
“Secure Boot is enabled, but your device is using an older boot trust configuration that should be updated.” This indicates your certificates are outdated and require immediate attention.
The Universal PowerShell Method (for All Supported Windows Versions)
For a definitive check on all supported Windows versions, especially to verify the “active” and “default” certificate databases, PowerShell is your most reliable tool.
([System.Text.Encoding]::ASCII.GetString((Get-SecureBootUEFI db).bytes) -match 'Windows UEFI CA 2023')
You will receive either True or False:
A True result confirms your PC is actively using the updated “Windows UEFI CA 2023” certificates. You’re prepared.
A False result means your machine is still on the older, expiring certificates. Further action is needed.
Advanced Check: Verifying Default Certificates
To see if your system’s BIOS has the new certificates baked into its firmware, run this command:
([System.Text.Encoding]::ASCII.GetString((Get-SecureBootUEFI dbdefault).bytes) -match 'Windows UEFI CA 2023')
A True here is ideal, indicating the new certificates are intrinsically part of your system’s default boot process. A False might mean an OEM firmware update is needed for long-term resilience, especially if you ever reset your Secure Boot keys.
Step-by-Step Solutions to Update Your Certificates
If your checks revealed outdated certificates, don’t panic. Here’s a structured approach to getting your PC up to date.
Solution 1: Windows Update (The First and Easiest Step)
For most Windows 11 users, Microsoft is delivering the new certificates automatically through routine updates.
After installing updates and restarting your PC, re-run the PowerShell check from Step 1 to confirm the new certificates have been applied successfully.
Solution 2: OEM Firmware Updates (When Manufacturer Support is Key)
If Windows Update doesn’t resolve the issue, especially on slightly older hardware, the fix may require a firmware (BIOS) update directly from your PC manufacturer.
While many newer PCs (2024 and 2025 models) already include the updated certificates, and those shipped with Windows 11 typically have a BIOS update available, support for very old systems (pre-2019/2020) might vary.
Solution 3: Manual Registry Method (A Windows 11 Workaround)
For situations where a firmware update isn’t available but your PC can still run a supported version of Windows 11, Microsoft offers a manual workaround that bypasses direct BIOS access.
reg add HKEYLOCALMACHINESYSTEMCurrentControlSetControlSecureboot /v AvailableUpdates /t REG_DWORD /d 0x40 /f Start-ScheduledTask -TaskName "MicrosoftWindowsPISecure-Boot-Update"
You will need to restart your PC a couple of times after this command executes. Once it’s back up, re-run the PowerShell check from our earlier steps to confirm the successful application of the new certificates.
Solution 4: Resetting Secure Boot Keys (For Stubborn Systems)
Sometimes, issues like a full or fragmented NVRAM (non-volatile RAM) can prevent new certificates from being installed. A factory reset of Secure Boot keys within your PC’s BIOS can create the necessary space.
Your system should then attempt to re-provision Secure Boot with the latest certificates available. Re-run the PowerShell check afterward.
Special Considerations for Windows 10 Users
It’s crucial for Windows 10 users to understand their specific situation. Microsoft has explicitly stated that unsupported versions of Windows 10 will not receive the updated Secure Boot certificates. Windows 10 reaches its end of support on October 14, 2025.
If you’re on Windows 10 without an Extended Security Update (ESU) subscription, none of the above methods will directly help you obtain the Secure Boot certificate update. The only path for these users to receive the update and continue to be supported is by enrolling in an ESU subscription before the October 2026 deadline. This program provides security updates for Windows 10 for up to three years, with specific pricing for education and commercial customers. For consumers, meeting certain criteria can enable a free ESU. Upgrading to Windows 11 remains the most straightforward path to ongoing security and compatibility.
Frequently Asked Questions
What exactly is Secure Boot and why is its certificate expiry a concern?
Secure Boot is a vital security feature in your PC’s firmware (UEFI) that verifies software during startup to prevent malicious code, like rootkits, from loading. Its digital certificates ensure only trusted programs run. The original certificates expire in June 2026. If your PC doesn’t receive updated certificates, it will enter a “degraded security state,” making it vulnerable to new boot-level attacks and potentially causing future compatibility or even booting issues with newer software and operating systems.
How can I quickly check my Windows PC’s Secure Boot certificate status?
For Windows 11 users, the quickest method is via the Windows Security app: go to “Device Security” and check the “Secure Boot” section. It will indicate if your configuration needs updating. For a definitive, universal check, open PowerShell as an administrator and run the command ([System.Text.Encoding]::ASCII.GetString((Get-SecureBootUEFI db).bytes) -match 'Windows UEFI CA 2023'). A True result means your certificates are updated; False means action is required.
My PC shows “False” after the check, what’s the immediate next step I should take?
If your PC reports “False,” your immediate first step is to run Windows Update. Go to “Settings” > “Windows Update” and click “Check for updates.” Install any pending updates and restart your PC. Many systems receive the new certificates this way. After the restart, re-run the PowerShell check to confirm. If this doesn’t resolve it, then consider checking your PC manufacturer’s support site for specific firmware updates.
Proactive Security: Staying Ahead of the Curve
Ensuring your Secure Boot certificates are up-to-date is a critical component of maintaining a robustly secure PC. Beyond this specific issue, continuous attention to your system’s health is paramount. Always keep Windows Update enabled and set to automatic installation. Consider sharing diagnostic data with Microsoft, as this helps tailor necessary security updates to your specific hardware.
Microsoft is also actively developing further security enhancements for Windows 11, including more explicit notifications for faulty Secure Boot configurations. By staying vigilant and utilizing these tools, you ensure your PC remains protected against the evolving landscape of cyber threats, securing your digital future. Don’t wait for problems; take control of your PC’s security today.