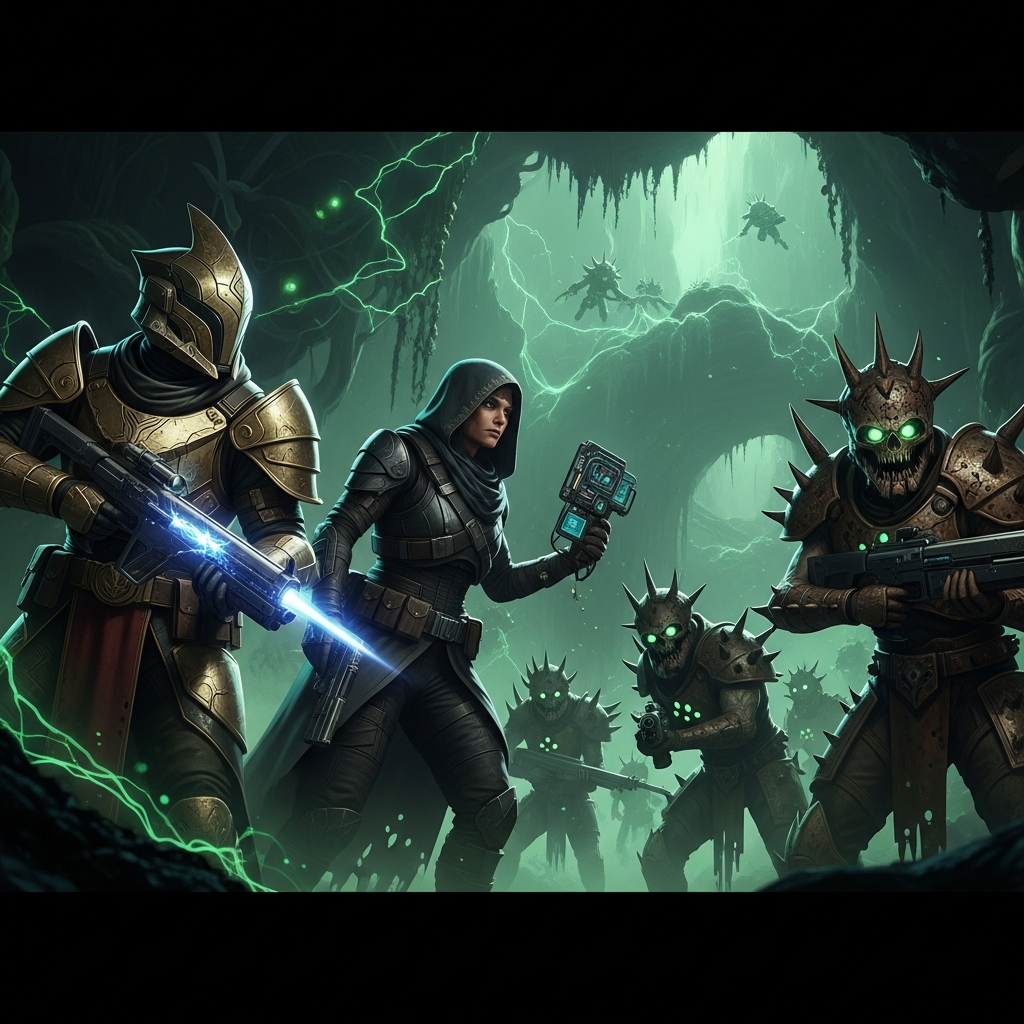
Prepare, Guardian, for Destiny 2’s latest challenge: the Equilibrium dungeon. Launched with the Renegades expansion, this 3-player activity plunges you into a perilous quest alongside Aunor Mahal. Your mission? Hunt down the insidious acolytes of Dredgen Bael. This isn’t just another challenge; it’s a gateway to coveted new rewards. Master its intricate mechanics, defeat formidable bosses, and claim exclusive loot. Our comprehensive guide ensures you navigate every twist and turn. Discover the powerful Heirloom Exotic bow, a full suite of dungeon-exclusive armor, and unique legendary weapons. We break down every encounter, mechanic, and secret. You’ll conquer Destiny 2 Equilibrium Dungeon with confidence. Let’s dive in and unravel its mysteries.
Accessing the Equilibrium Dungeon
Accessing the Destiny 2 Equilibrium Dungeon requires specific preparation. First, you must own the Renegades expansion. Additionally, your fireteam leader needs to progress the “The Way Between” pursuit. Obtain this pursuit from Aunor in the Tharsis Outpost Cantina. It unlocks after completing Step 5 of the main Renegades campaign.
For those brave enough to tackle Contest Mode, a Power level of 370 is highly recommended. Falling below this incurs significant penalties to damage output and resistance. Ensure your team is properly equipped before entering this high-stakes activity.
Core Mechanics Explained: Shadow Energy
The Equilibrium dungeon introduces a vital mechanic: Shadow energy. You collect this power by picking up “Taken wells” found throughout the encounters. This energy evolves through distinct stages:
Gathering Shadow: The initial collection phase.
Shadow Novice: A powerful buff with a 45-second timer. It allows you to break enemy shields or activate specific devices. Dead Gladiators can refresh this buff.
Shadow Apprentice: Requires even more Shadow energy. This advanced stage is crucial for activating complex panel sequences. It also enables special melee attacks.
Shadow Master: The ultimate tier of Shadow energy. This powerful buff is essential for the final encounter’s unique mechanics.
Your Renegade ability button activates these enhanced Shadow powers. Mastering these buffs is key to surviving and progressing.
Equilibrium’s Coveted Rewards
The Destiny 2 Equilibrium Dungeon offers an impressive array of exclusive rewards. Unlike many dungeons with four new legendaries, Equilibrium provides six unique legendary weapons. You can also earn a complete set of Sage Protector armor. The crown jewel, however, is the Heirloom Exotic Bow.
All legendary dungeon weapons boast a new Origin Trait: Imperial Allegiance. This trait boosts cooling/charge rate and increases damage at high heat/low guard energy. Beyond gear, collect exclusive emblems, shaders, and the Arid Rambler Exotic Sparrow. The dungeon even features unique customization options for the Praxic Blade. Look for the “Taken” Crystal, “Offensive Form,” “Invigorating Blade” Focus, and the “Energy Conduit” Catalyst. These exclusive items drop from various dungeon activities.
Dungeon Walkthrough: Opening the Path
You’ll spawn in the Temple Grounds on Venus. Your first objective is simple: clear the area. Waves of Cabal enemies will drop in immediately. Wipe them out before pushing forward. Nothing here poses a significant threat, but enemies can quickly slow your progress. A yellow-bar Cabal, the “Imperium Generalis,” spawns in this opening section.
Pro Tip: Cabal drop pods crash down on both sides of the arena. These pods instantly kill you. Always stay clear of the impact zones.
Once the area is clear, move towards the waterfall ahead. Jump down, dropping all the way to the bottom. Head into the tunnel. Inside, you’ll encounter a few Cabal War Beasts. Clear them swiftly. This section is mostly a short run to the first real arena. Continue through the tunnel and follow the path until you exit on the other side. The first encounter area appears directly in front of you.
First Encounter: Harvester’s Harvest
This first main encounter is called Harvester. You’ll juggle arena control and building Shadow energy. The goal is to use Shadow Novice to break enemy shields and advance the fight.
Mechanics Overview:
- Initiate the Encounter: Interact with the ship in the middle of the arena to begin.
- Clear Ads and Watch for Apprentices: Immediately clear enemies. The arena can become chaotic fast. Red-glowing “Nameless Apprentices” will appear. These look like they’re about to explode. They link to the red barrier doors around the arena.
- Deal with Nameless Apprentices: When an Apprentice is about to detonate, bait it to an array (satellite) next to its matching red door. Activate the array as the Apprentice explodes. This destroys the array and opens the red barrier door. There are six Apprentices in total; no more spawn after the sixth.
- Gather Shadow Novice: Head into the newly opened side rooms. Use the Sparrows found inside. Ride the short courses around the arena, collecting Taken wells. Keep collecting until your Gathering Shadows meter fills. It will convert into Shadow Novice with a 45-second timer.
- Break Shields: Hit your Renegade ability button to activate Shadow power using your Shadow Novice buff. Return to the middle. Use your Shadow power to destroy immune shields on specific enemies. Then, take them down. If your timer runs low, pick up Shadow Novice drops from dead Gladiators to refresh it.
- Complete the Encounter: After dealing with all six Nameless Apprentices, clear all remaining ads. Then, take down the Behemoth Walkers that spawn. Collect your loot. Interact with the central ship to board it. This transports you to the main ship.
- Initial Positioning: As you drop in, do not linger in the middle. Harrow can appear suddenly and instantly kill you. Always assume the boss is about to strike. Your early goal is to rotate into the outer U-shaped rooms. Here, you can farm enemies and build Shadow energy.
- Building Shadow Apprentice: In the outer rooms, kill enemies and collect the Taken wells they drop. This builds Shadow energy. It progresses from Gathering Shadow, to Shadow Novice, then to Shadow Apprentice. Harrow wields a Praxic Blade, so look for “Invigorating Blade” Focus or “Offensive Form” drops here.
- Activating Panels: With the Shadow Apprentice buff, activate the glowing Taken-like panels. These are scattered around each room (on walls, higher up, and on the ceiling). Use your Renegade ability key to throw a Taken energy blast. You must activate these panels in succession, adhering to a timer. Commit to a route and keep moving through the U-shaped rooms. Refresh your Shadow energy as needed.
- Emergency Subsystems & Center Phase: When the on-screen prompt “Emergency subsystems activate” appears, return to the center room immediately. Harrow will charge up and explode, an instant kill if you’re exposed. Take cover. Once safe, activate more Taken panels in the middle. Continue clearing ads.
- Shield Removal – Phase 1: Shoot the Arc fuses on each side of the arena. This opens two holes. Bait Harrow into these holes. Each hole removes one-third of his immune shield.
- Shield Removal – Phase 2 (Overload Generator): After Harrow’s shield breaks once, you must again activate all panels using your Shadow Apprentice buff. This activates the overload generator, located on the far left of the room. When Harrow has roughly 33% shield left, bait him to this generator. It will drain the final bit of his shield.
- DPS Phase: Damage Harrow as much as possible.
- Final Stand: Repeat the process until Harrow reaches his final stand. He will destroy the big gate in the middle. Follow him to the next area, jumping across. Cabal Centurions and turrets will spawn. Clear the Centurions fast to avoid being overwhelmed. Then, finish off Harrow’s remaining health to complete the encounter.
- Lure of the Dark Timer: As the fight begins, a 45-second “Lure of the Dark” timer starts. This is your setup window.
- Ascendant Arena: When the timer hits zero, you get pulled into a Taken version of the same arena. Five copies of Sere, called “Blistered Shadows,” await you here. Shadow energy pools are scattered around to help you maintain your buff.
- Compel Blistered Shadows: With Shadow Master, approach each Blistered Shadow. Press “interact” to Compel them. Each Compel grants one stack of Lure of the Dark. It also earns you the ability to shoot one Taken orb when you return to the normal arena. One Blistered Shadow is higher up. Activate a Darkness-corrupted device (like earlier in the dungeon) to make ghost platforms appear. Use these to climb and Compel the last Blistered Shadow.
- Orb Destruction and DPS: Your goal is to return to the normal arena with five stacks of Lure of the Dark. Finish off any remaining Nameless Apprentices. Then, destroy the five Taken orbs in the middle. This triggers the damage phase on Sere.
- Arc Energy Phase: When the damage phase ends and Sere is still alive, the arena’s middle becomes deadly. It fills with Arc energy. You must sprint to the edges until it subsides.
- Repeat and Conquer: Repeat the entire cycle: build Shadow, go to the Ascendant arena, Compel the five Blistered Shadows, break the Taken orbs, and damage Sere again. Continue until Dredgen Sere is defeated.
- Praxic Blade Customizations: “Taken” Crystal, “Offensive Form,” “Invigorating Blade” Focus, “Energy Conduit” Catalyst.
- thegamepost.com
- www.shacknews.com
- thegamepost.com
- www.ign.com
- <a href="https://www.yardbarker.com/videogames/articles/destiny2customizingthepraxicbladeguide/s117458_43161217″>www.yardbarker.com
Ascending the Malphas Contemptus (Traversal 1)
After the Harvester encounter, you’ll find yourself near the ship that transported you. Turn around. Start working your way up the floating platforms above. As you climb, you’ll spot a breakable vent. Shoot it to open the path forward.
Once inside, simply follow the main path. You’ll reach a large gate leading into a room filled with Cabal. Clear them out. Watch for an “Imperium Decurion Praetorian” (yellow-bar). This enemy hits harder and can stall your progress.
Continue until you reach a smaller room with Psions. This serves as your first “progress check.” You must shoot three Arc fuses to open a hatch. These fuses are small, blue, and visibly crackling with electricity. Two are on either side of the main door. The third sits above a box in the room’s middle. Shoot all three to open the hatch.
Navigating the Ship’s Push
From here, you must jump across to the next platform. Be ready for the ship’s movement to push you right mid-air. An Eager Edge sword makes this jump much safer. It allows for mid-air corrections and quick gap traversal. Psion snipers will also target you; prioritize clearing them immediately.
After the jump, you’ll see two red-lit doorways: one on the left, one in the middle. Both rooms are blocked by red barrier fields. You need to disable these to proceed.
Secret Treasure: First Chest Location
The first secret chest is in the middle room. Head inside and clear the enemies. Look towards the back-right side of the room. The chest sits atop a platform near the back, on the right.
To progress, enter the left room. Find and shoot a fuse. This drops the barrier between the left and middle rooms. Next, locate a second fuse on the right side of the area. Shoot it to disable the next barrier, opening your route forward.
Continue ahead, following the main path and clearing Cabal. You’ll encounter another breakable vent. Shoot it from a safe distance, then move in after the explosion. Caution: An explosive device is inside this vent. Do not stand too close when you break it.
After the vent, drop down and push forward through more Cabal. You’ll eventually reach a small vent opening with a red glowing light. This leads directly into the second encounter area.
Second Encounter: Harrow, Dredgen-Apprentice
To begin this encounter, look above the door in front of you (from the Rally banner location). Shoot the fuse above the door. This opens a hatch on the floor. Drop down through the hatch to enter the boss arena and begin the fight against Harrow, Dredgen-Apprentice.
Boss Mechanics:
Pro Tip: You can speed up Harrow’s immune shield breaks. Use the Taken melee ability (Shadow Apprentice) right as Harrow jumps back up from a hole. Timed correctly, this push can remove up to 50% of his shield in one go! Repeat this twice, then bait Harrow into the generator. This extends your DPS window by roughly 10 extra seconds. You can use this setup once per phase, for up to three total uses in the fight.
Deeper Into the Ship (Traversal 2)
After defeating Harrow, look in front of the reward chest. You’ll see two panels on either side of the room. Activate both using Shadow energy. Then, flip the switch to open the bay door. This begins the next platforming section.
Don’t jump immediately. Wait a moment until you exit hyperspace. Look below you and to the left until the Malphas Contemptus ship appears. Drop down onto the small platform on the ship’s outer edge.
From there, follow the outer platforms to the far end. Turn left. You’ll spot two red-lit switches. Activate both to open a door on the left wall. Jump inside and start descending. Your goal is to go down and forward. Drop to the lowest safe level. Then, continue along the ship’s underside, using the red-lit platforms as your main route.
Navigating the Hangar
As you progress, you’ll eventually see a breakable vent on your left. Shoot it open and proceed. Follow the path until the “Malphas Contemptus” area marker appears on your HUD. Continue forward into a massive hangar. Clear the Cabal enemies inside (a Behemoth Walker will be present). Head to the central console and activate it to turn on the moving platforms.
Once active, ride the platforms up and to the right. Use the central circular platform to lift yourself into the ship’s interior. This next section features mostly straightforward corridors. Move through the linear hallways filled with pipes. You’ll reach a larger room with two Behemoth Walkers and an inactive Cabal tank (with four legs) on a platform. Take out the Walkers. Then, head to the tank elevator at the back of the room. Crouch to enter the tunnel underneath it.
The Vertical Tube Puzzle
Inside the tunnel, you’ll drop into a vertical tube. Four shootable grates/vents are at the bottom. Three lead to dead ends; only one continues forward. Don’t overthink it. Shoot a grate, check the path. If it’s a dead end, backtrack and try the next until you find the correct route. (One dead end holds a collectible!)
That path leads into another huge room. Your objective is to reach an open pipe high above the far side of the arena, across a large gap. This pipe is up and to the left of the enemy spawn platform. Many ways exist to get there; use your team’s preferred method.
Initially, the pipe will be closed. To open it, activate one of the three panels with Shadow Apprentice energy. This opens the pipe’s entrance. Defeat the Cabal that spawn here after activating a panel.
Pro Tip: Grapple and/or an Eager Edge sword makes crossing this gap faster and safer.
Once you enter the open pipe, it’s another linear run through tight passageways. You’ll reach a room with a Cabal Behemoth Walker and many War Beasts. Clear them. Go through the door. You’ll see two Cabal Praetorian enemies. Take them out. Enter the door they guarded. This leads to the final boss encounter.
Third Encounter: Dredgen Sere (Final Boss)
This is the final encounter of the dungeon. You’re up against Dredgen Sere, who wields immense Arc and Taken energy. Start the fight by walking up to or shooting Sere (or the kneeling Apprentices). Do not stand too close at the start; his first slam can instantly kill you.
Ultimate Boss Mechanics:
Build Shadow Master: During this timer, collect Gathering Shadow until it upgrades all the way to Shadow Master.
Eliminate Nameless Apprentices: Kill as many Nameless Apprentices as possible. They are tied to destroying the five Taken orbs in the middle of the arena.
Pro Tip: During DPS, if Sere is shooting lightning, target his glowing hands. Shooting them interrupts his attack and briefly stuns him, giving you crucial breathing room. Consider using a Well of Radiance Warlock for sustained damage, combined with high burst damage weapons like Parasite or Gjallarhorn.
After successfully defeating Sere, a reward chest will appear in the middle of the room. Congratulations, Guardian! You’ve conquered the Destiny 2 Equilibrium Dungeon!
Equilibrium Dungeon Rewards: The Full Breakdown
The Equilibrium dungeon rewards include powerful new gear and unique collectibles. Here’s a detailed list:
Exotic Weapon: Heirloom Exotic Bow (Solar, Heavy Ammo). Features “Bolt Thrower” (explosive bolts, Unstoppable Champion counter) and “Big Game Hunter” (overcharge bolts for increased damage/AoE). Its Catalyst adds Scorch on direct hits and increased damage against scorched targets.
Legendary Weapons: All feature the new Imperial Allegiance Origin Trait.
Zealous Ideal (Solar Auto Rifle, 450 RPM): Perks include Onslaught, Heal Clip, Incandescent. (Drops from Harvester)
Bitter End (Arc Machine Gun, 900 RPM): Perks include Jolting Feedback, Killing Tally, One For All.
High Tyrant (Void Pulse Rifle, 540 RPM): Perks include Master of Arms, Destabilizing Rounds, Repulsor Brace.
Voltaic Shade (Arc Scout Rifle, 260 RPM): Perks include Voltshot, Jolting Feedback, Precision Instrument.
Conspiracy Honed (Stasis Sniper Rifle, 140 RPM): Perks include Box Breathing, Vorpal Weapon, Firing Line.
Sullen Claw (Void Sword): Perks include Eager Edge, Destabilizing Rounds, Whirlwind Blade. (Drops from Harrow)
Armor Set: Sage Protector Armor (Helmet, Arms, Chest, Legs, Class Items). (Drops from Harvester, Harrow, Sere)
Emblems: Dredgen’s Descent (Contest Mode Completion), Stand Alone (Solo Flawless), Superiorly Connected (Normal Completion).
Shaders: Imperium Parade (Solo Completion), Praxic Drape (Find all Collectibles).
Exotic Sparrow: Arid Rambler (Flawless Completion).
Frequently Asked Questions
What is the core mechanic of the Destiny 2 Equilibrium Dungeon?
The core mechanic of the Destiny 2 Equilibrium Dungeon revolves around collecting “Shadow energy.” This energy progresses through four distinct stages: Gathering Shadow, Shadow Novice, Shadow Apprentice, and Shadow Master. Each stage grants increasingly powerful abilities, allowing players to break enemy shields, activate specific panels, or interact with unique boss mechanics. Mastering the collection and deployment of these buffs using your Renegade ability button is crucial for completing every encounter and overcoming the challenges presented by the acolytes of Dredgen Bael.
How can I maximize my chances to get the Heirloom Exotic Bow?
To maximize your chances of obtaining the Heirloom Exotic Bow from the Equilibrium dungeon, prioritize completing the dungeon during its initial “Contest Mode” window if available, as this often guarantees a drop. Outside of Contest Mode, your drop rate can be significantly improved by completing various associated triumphs within the dungeon. These include achieving a solo clear, a flawless clear (without dying), or completing the dungeon on Master difficulty. Each of these accomplishments boosts the chances of Heirloom dropping from the final encounter chest.
What are the best weapon rewards from the Equilibrium Dungeon?
The Equilibrium dungeon offers six new legendary weapons, all featuring the unique “Imperial Allegiance” Origin Trait. Standout options include the Zealous Ideal Solar Auto Rifle with perks like Incandescent for add clear, and the Sullen Claw Void Sword which can roll with Eager Edge for enhanced mobility or Destabilizing Rounds for Void synergy. The High Tyrant Void Pulse Rifle and Voltaic Shade Arc Scout Rifle also offer strong PVE utility with perks like Repulsor Brace and Voltshot, respectively. The Conspiracy Honed Stasis Sniper Rifle provides excellent boss damage with perks such as Box Breathing and Firing Line.
That’s it for our Destiny 2 Equilibrium Dungeon guide! As players lock in the best builds and loadouts for each encounter, we’ll keep updating this guide with cutting-edge tips and strategies. What powerful weapon rolls did you secure? Share your triumphs and tips in the comments below!